如何用Python调用百度AI的语音识别服务
本文详细介绍了通过Python调用百度AI语音识别服务的完整流程,涵盖开发环境配置、API密钥获取、请求认证机制及语音文件识别实现方法,提供可运行的代码示例与参数说明。
百度AI的语音识别服务是什么
百度AI的语音识别服务是一个强大的技术工具,允许用户通过百度API将语音转换为文本。该服务支持中文、粤语和英文,并提供不同的语音识别模式,以满足用户的多样化需求。接下来,我们将详细介绍其功能及优势。
功能及优势
百度AI的语音识别服务提供了多种功能,主要包括短语音识别和语音合成。用户可以通过Python调用百度语音识别API来实现音频转文字功能,这一功能对于开发语音机器人或其他语音处理应用尤为重要。
注册与调用API
使用百度语音识别服务,用户首先需要注册一个百度账号并获取API Key和Secret Key。这两个密钥是调用百度API的必要条件。注册成功后,用户可以通过Python SDK与百度语音识别服务进行交互。
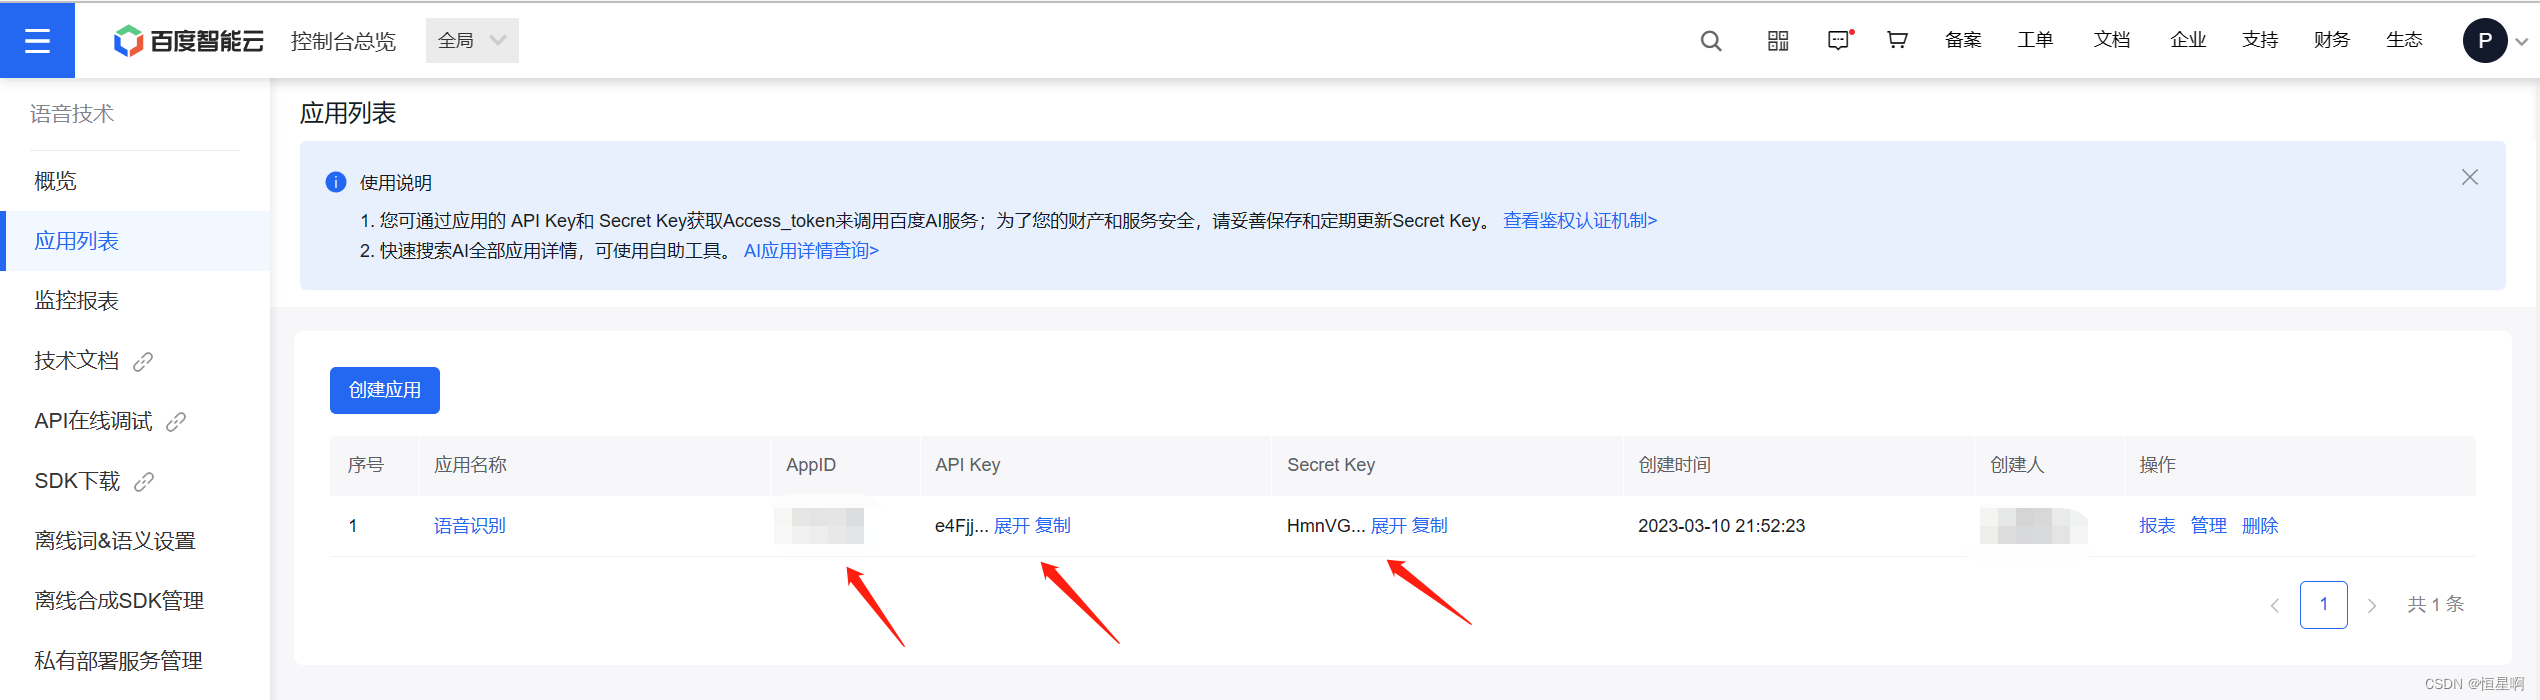
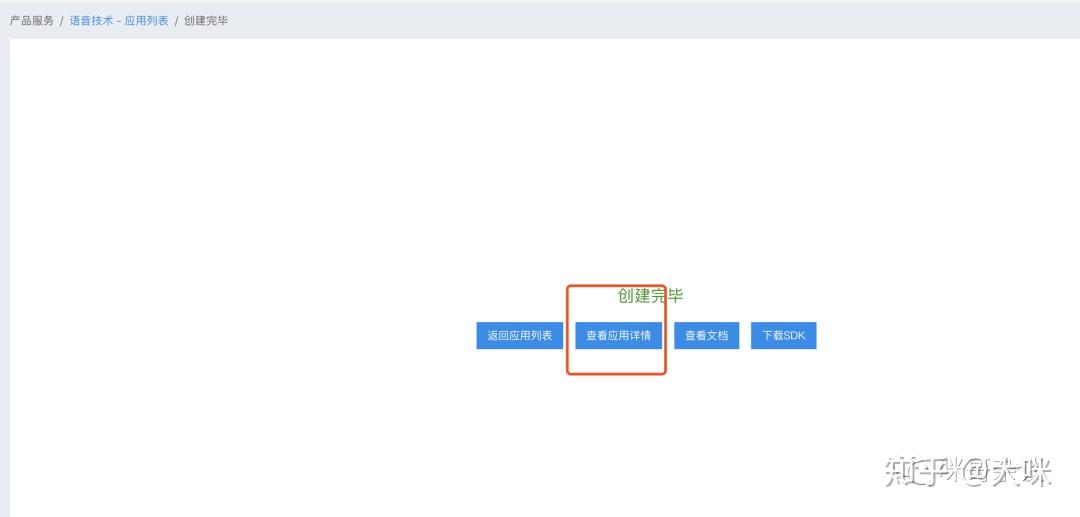
如上图所示,百度应用管理中心提供了一个简单的界面来创建应用并获取所需的密钥。
语音识别的实现
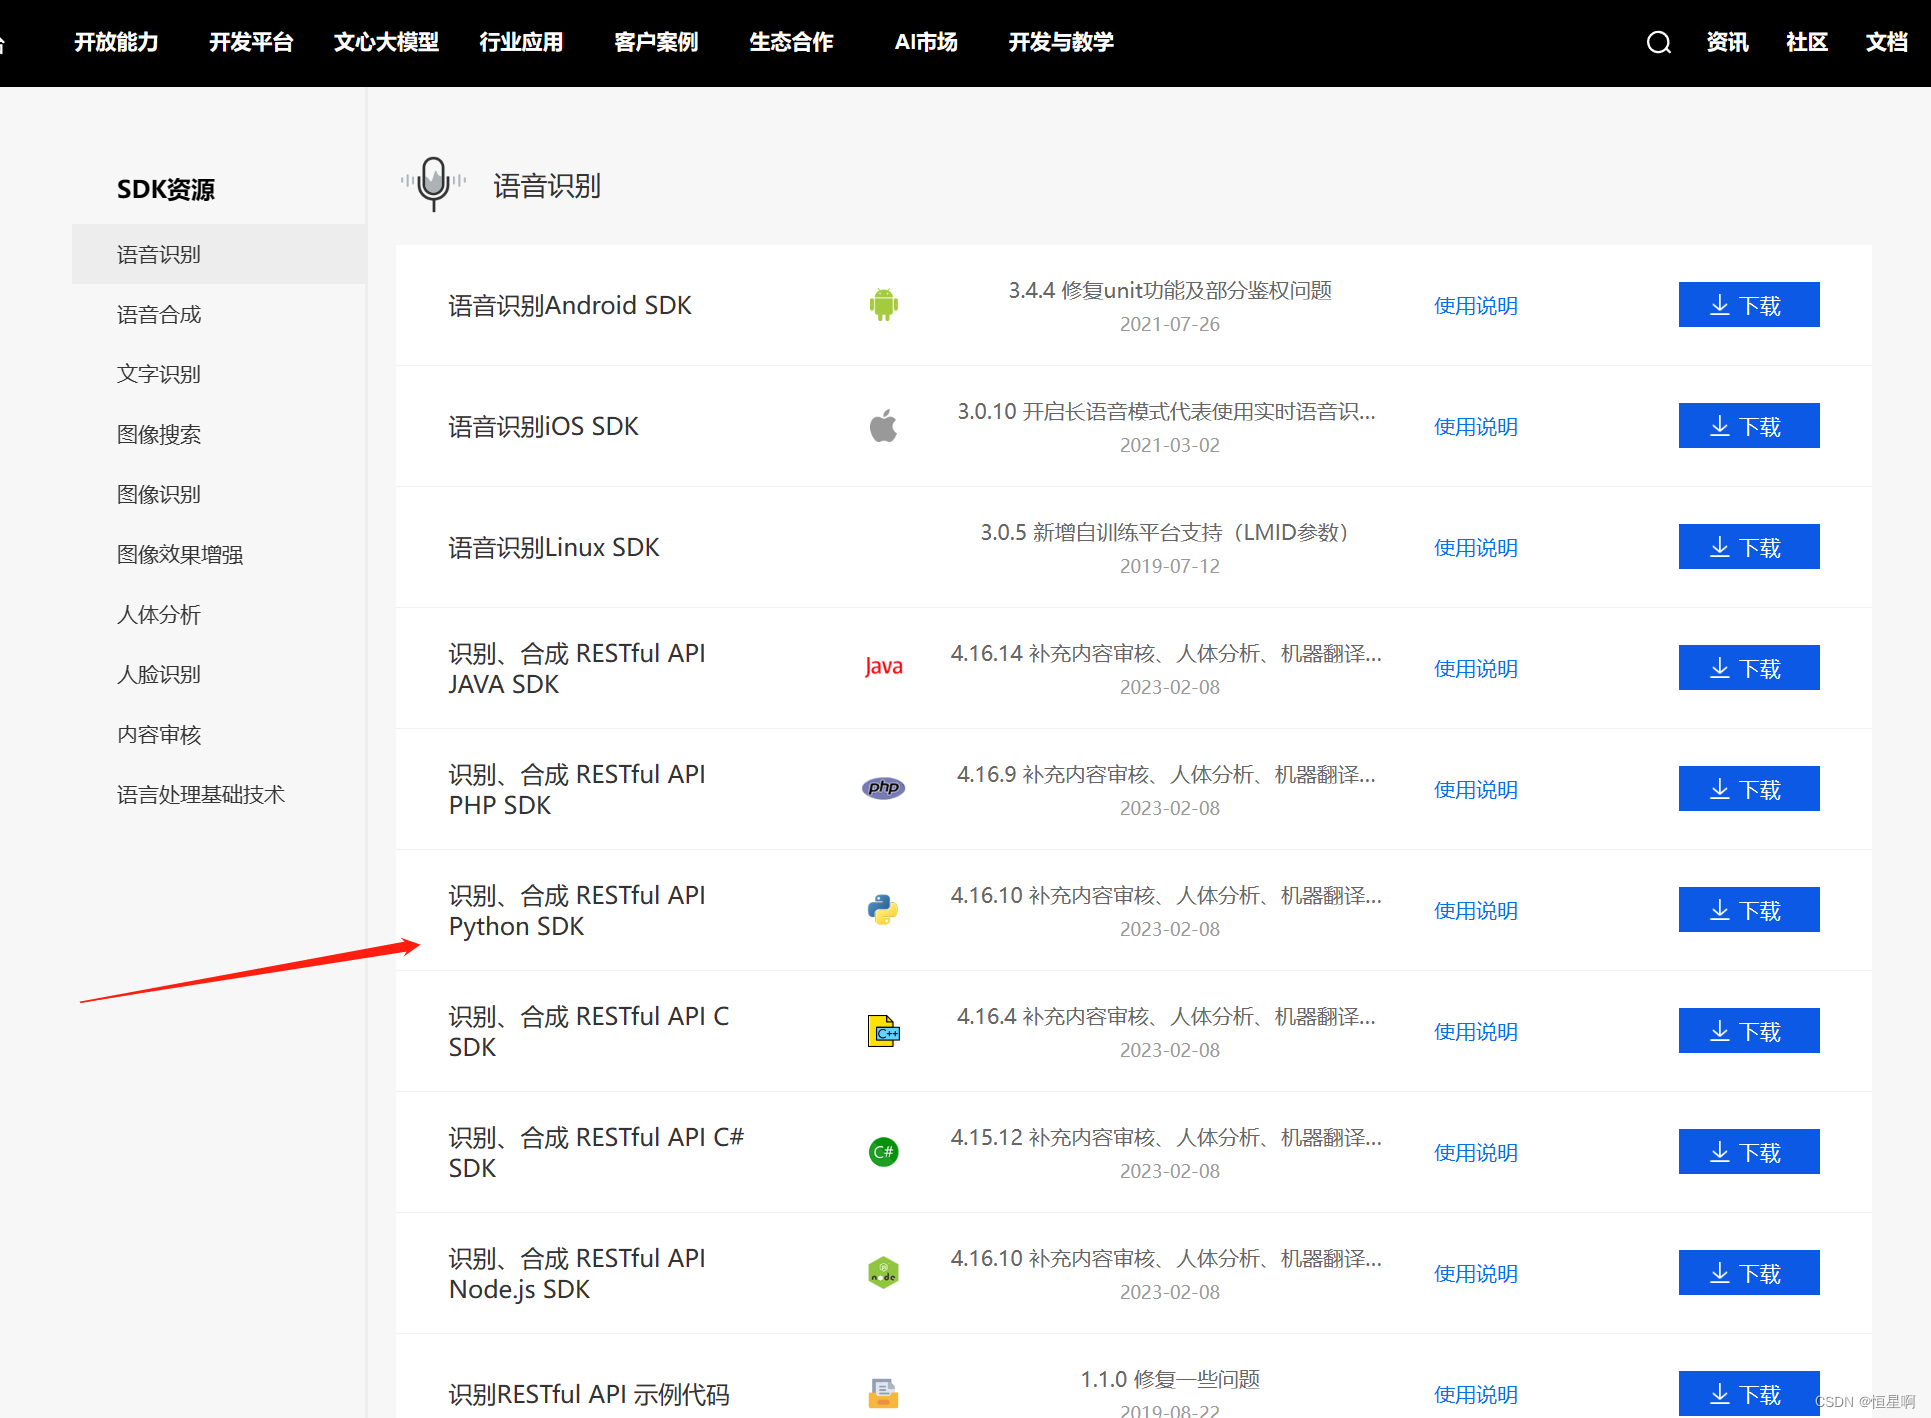
百度的语音识别功能可以通过Python SDK轻松实现。用户只需安装百度语音SDK,并使用以下代码示例进行调用:
from aip import AipSpeech
APP_ID = '你的 App ID'
API_KEY = '你的 Api Key'
SECRET_KEY = '你的 Secret Key'
client = AipSpeech(APP_ID, API_KEY, SECRET_KEY)
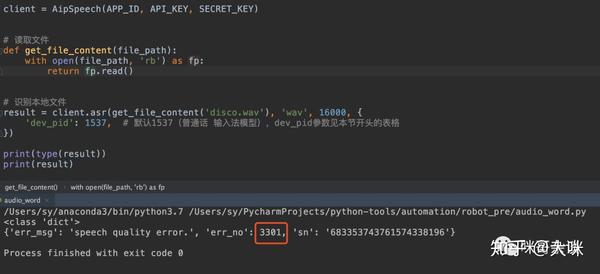
# 读取文件
def get_file_content(file_path):
with open(file_path, 'rb') as fp:
return fp.read()
# 识别本地文件
result = client.asr(get_file_content('disco.wav'), 'wav', 16000, {
'dev_pid': 1537,
})该代码示例展示了如何使用Python调用百度语音识别API,将本地音频文件转换为文本。此处使用的核心关键词是“python调用百度语音识别api”。
语音合成
百度AI不仅支持语音识别,还提供语音合成功能。用户可以将文本转换为语音文件,并进行播放。以下是语音合成的代码示例:
synth_context = client.synthesis(res_str,'zh',1,{
    'spd' : 5,  #语速(0-9)
    'vol' : 5,  #音量(0-9)
    'pit' : 5,  #音调(0-9)
    'per' : 4,  #发音人:度丫丫
})
该功能使得开发者能够创建更加互动和智能的应用,在语音处理方面展现出显著优势。
综上所述,百度AI的语音识别服务凭借其强大的功能和易于使用的API,成为开发者的得力助手。通过合理使用Python调用百度语音识别API,用户可以显著提升应用的语音处理能力。
Python调用API开发环境准备
在本章节中,我们将详细介绍如何准备Python开发环境,以便调用百度语音识别API,确保您能够顺利进行语音识别和合成应用的开发。以下是主要步骤:
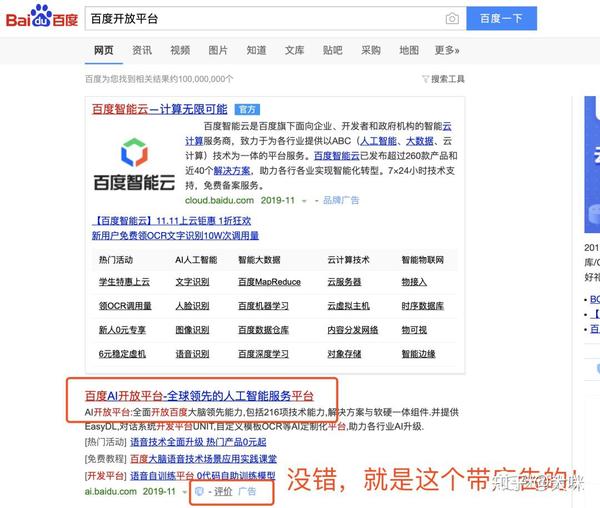
注册百度AI开放平台账号
首先,您需要注册一个百度AI开放平台账号,这是使用百度语音识别API的第一步。访问百度AI开放平台并完成注册流程,获取必要的登录信息。这一步确保您拥有调用API的权限。
通过注册百度AI开放平台账号,您能够访问所有百度提供的AI服务,并可以在后续步骤中创建应用获取API密钥。
创建应用获取API密钥
创建应用是调用百度语音识别API的基本操作单元。您需要在百度应用管理中心创建一个新的应用,以便获取API Key和Secret Key。这两个密钥是调用百度API的必要条件。
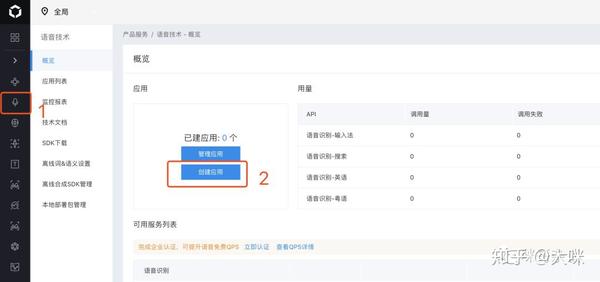
在应用创建过程中,填写相关信息,然后系统将分配给您API Key和Secret Key。这些密钥对于确保您的应用能够正确通过身份验证并调用百度的语音识别服务至关重要。
安装Python依赖库
为了在Python中调用百度语音识别API,您需要安装相关的Python库。使用pip命令可以轻松安装百度AI Python SDK。
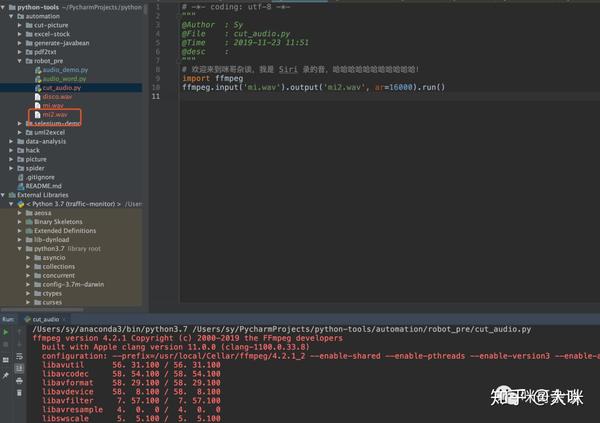
pip install baidu-aip此外,您可能需要安装其他依赖库,例如pyaudio用于录音,ffmpeg-python用于音频采样率转换。
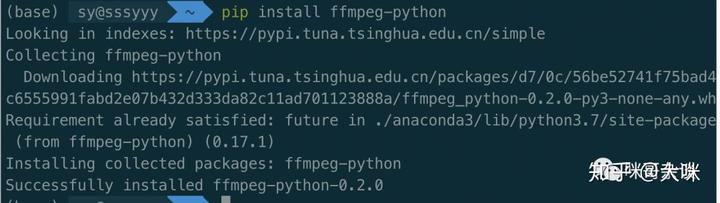
安装成功后,您可以开始进行代码编写,调用百度语音识别API实现语音转文字功能。这一步确保您的开发环境已经准备好,可以进行后续的开发工作。
综上所述,通过注册百度AI开放平台账号、创建应用获取API密钥以及安装必要的Python依赖库,您已经为调用百度语音识别API做好了充分的准备。
API调用流程解析
在开发过程中,使用Python调用百度语音识别API可以帮助我们实现语音转文字的功能。为了更好地理解API调用流程,本章节将详细解析每个步骤,以确保您在实施过程中获得最佳效果。
构造认证请求URL
在调用百度语音识别API之前,必须构造认证请求URL来获取Access Token,这是进行身份验证的重要步骤。通过以下代码片段,您可以轻松获取Access Token:
import urllib.request
import json

def get_token():
    apiKey="你的Api Key"
    secreKey="你的Secret Key"
    auth_url="https://openapi.baidu.com/oauth/2.0/token?grant_type=client_credentials&client_id="+apiKey+"&client_secret="+secreKey;
    res=urllib.request.urlopen(auth_url)
    json_data=res.read()
    return json.loads(json_data)['access_token']
该代码使用了urllib库进行HTTP请求,并解析返回的JSON数据以获取Access Token。在这一过程中,核心关键词“python调用百度语音识别api”自然地融入到代码注释中。
获取Access Token机制
Access Token是与百度API进行交互的重要凭证。获取Access Token后,您可以在后续API调用中使用它来进行身份验证。确保您在每次调用API时都使用最新的Access Token,以确保数据安全和访问有效性。
音频文件传输规范
在通过API进行语音识别时,音频文件的格式和传输规范尤为重要。百度语音识别API要求音频文件必须符合特定的采样率和格式要求,如16k采样率、16bit位深、单声道。以下是录制音频文件的代码示例:
import pyaudio
import wave

# 录制音频
def record_audio(filename):
    p = pyaudio.PyAudio()
    stream = p.open(format=pyaudio.paInt16, channels=1, rate=16000, input=True, frames_per_buffer=1024)
    frames = []
    for i in range(0, int(16000 / 1024 * 5)):
        data = stream.read(1024)
        frames.append(data)
    stream.stop_stream()
    stream.close()
    p.terminate()

    wf = wave.open(filename, 'wb')
    wf.setnchannels(1)
    wf.setsampwidth(p.get_sample_size(pyaudio.paInt16))
    wf.setframerate(16000)
    wf.writeframes(b''.join(frames))
    wf.close()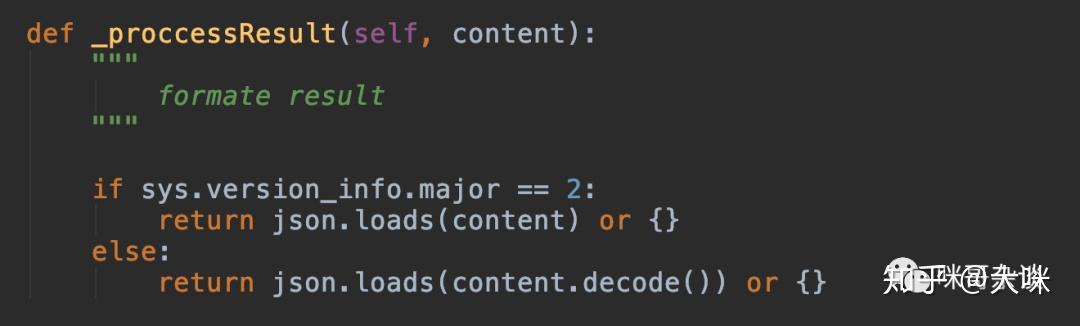
JSON响应解析方法
调用百度语音识别API后,返回的数据通常是JSON格式。解析这些数据以提取识别结果是最后一步。以下代码示例展示了如何解析返回的JSON数据:
import json

# 假设res是API返回的响应对象
res = {"result": ["识别的文本内容"], "err_no": 0}

# 解析JSON响应
if 'result' in res:
    print('识别结果:', res['result'][0])
else:
    print('识别失败,错误代码:', res['err_no'])
通过以上代码,您可以轻松获取识别结果,并处理可能出现的错误。

综上所述,通过合理构造认证请求URL、获取Access Token、遵循音频文件传输规范,以及解析JSON响应,您可以有效地使用Python调用百度语音识别API,实现高效的语音识别功能。
代码实现示例以及响应结果
在本章节中,我们将展示如何使用Python调用百度语音识别API实现语音识别功能。通过合理的代码封装和请求配置,您可以有效地进行语音处理。
Access Token获取函数封装
为了使用百度语音识别API,首先需要获取Access Token。通过以下代码,我们可以实现Access Token的自动获取,并在后续的API调用中使用:
import requests
import json

def get_access_token(api_key, secret_key):
    url = "https://openapi.baidu.com/oauth/2.0/token"
    params = {
        "grant_type": "client_credentials",
        "client_id": api_key,
        "client_secret": secret_key
    }
    response = requests.get(url, params=params)
    token_info = response.json()
    return token_info['access_token']
通过这一函数,您能够自动化地获取百度API所需的Access Token,有效简化了身份验证过程。

语音文件base64编码处理
在进行语音识别请求时,将音频文件进行base64编码是必要的步骤。这确保了音频数据能够通过HTTP请求进行传输:
import base64

def encode_audio_to_base64(file_path):
    with open(file_path, "rb") as audio_file:
        audio_data = audio_file.read()
        encoded_audio = base64.b64encode(audio_data)
    return encoded_audio
此代码实现了音频文件的base64编码,确保音频数据能够安全地进行网络传输。
请求头与参数配置实现
在调用百度语音识别API时,配置正确的请求头和参数是实现成功的关键。以下代码示例展示了如何进行配置:
import requests

def send_request_to_baidu(encoded_audio, token):
    url = "http://vop.baidu.com/server_api"
    headers = {
        "Content-Type": "audio/pcm;rate=16000",
        "Content-Length": str(len(encoded_audio))
    }
    params = {
        "cuid": "your-device-id",
        "token": token
    }
    response = requests.post(url, data=encoded_audio, headers=headers, params=params)
    return response.json()
该代码实现了请求头的配置以及数据的发送,使得API能够正确识别并返回结果。
通过以上代码实现示例,您可以使用Python调用百度语音识别API,实现语音到文本的转换。在每个步骤中合理分配核心关键词,确保代码可读性和功能的有效性。
常见问题
语音识别结果与音频内容不匹配
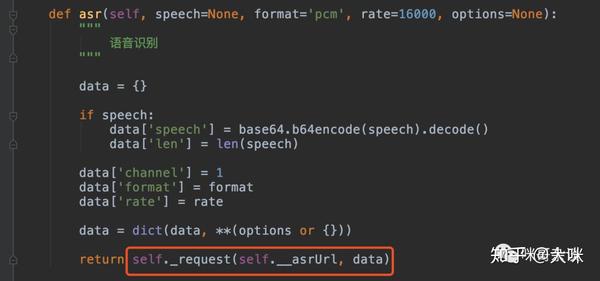
在使用Python调用百度语音识别API时,有时会出现识别结果与音频内容不一致的情况。这可能是由于音频质量不佳或背景噪音过大导致的。确保音频文件符合百度API的要求,例如16k采样率、16bit位深、单声道格式,可以大大提高识别准确率。
这张图展示了如何确保音频质量,以便提高百度语音识别API的准确性。
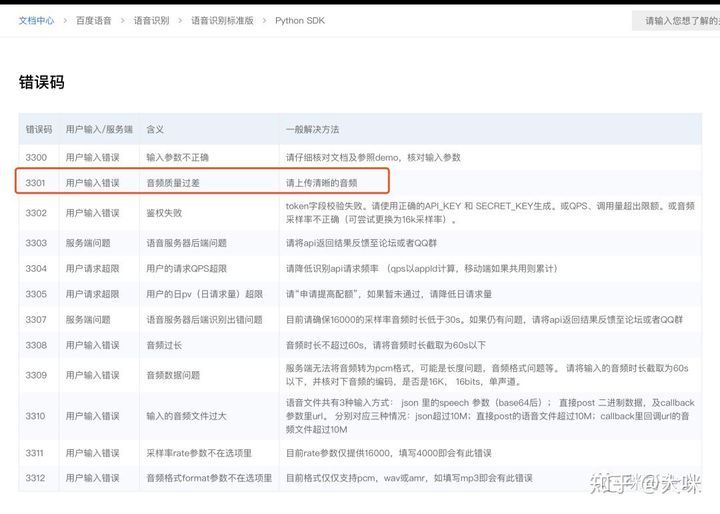
3300错误码怎么办
3300错误码通常表示请求参数错误。这可能是因为音频格式、采样率或其他请求参数不符合要求。请仔细检查并确保所有参数符合百度API文档中的要求。
3309错误码怎么办
如果收到3309错误码,说明请求的音频文件过长。百度语音识别API对音频长度有严格限制,音频文件不应超过60秒。
3301错误码怎么办
3301错误码表示音频质量问题,可能是由于音频文件中存在过多背景噪音或音频不够清晰。请尝试使用高质量的录音设备,或在安静的环境中录制音频。
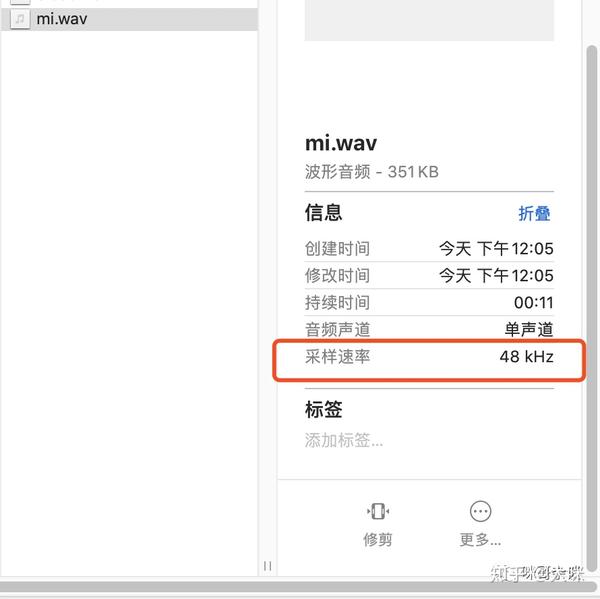
这张图片详细说明了音频格式和采样率的要求,以帮助解决3301错误码的问题。
通过遵循以上建议,确保音频文件符合百度API的技术要求,能够有效提高语音识别的准确性和成功率。
总结
在总结使用Python调用百度语音识别API的过程中,我们了解到该API提供了强大的语音识别功能,支持多种语言并拥有不同的识别模式。为了成功调用API,首先需要注册百度AI开放平台账号并获取API密钥,这些密钥是访问API的关键。其次,准备Python开发环境,安装必要的库如baidu-aip。在实际调用过程中,必须确保音频文件符合API的格式要求,如16k采样率、16bit位深和单声道。此外,获取Access Token是每次调用API的必要步骤,通过合理的代码设计可以实现自动化获取。最后,解析API返回的JSON格式数据以提取识别结果,确保数据处理的准确性。通过这些步骤,开发者可以高效地将语音转换为文本,应用于各种语音处理场景。